


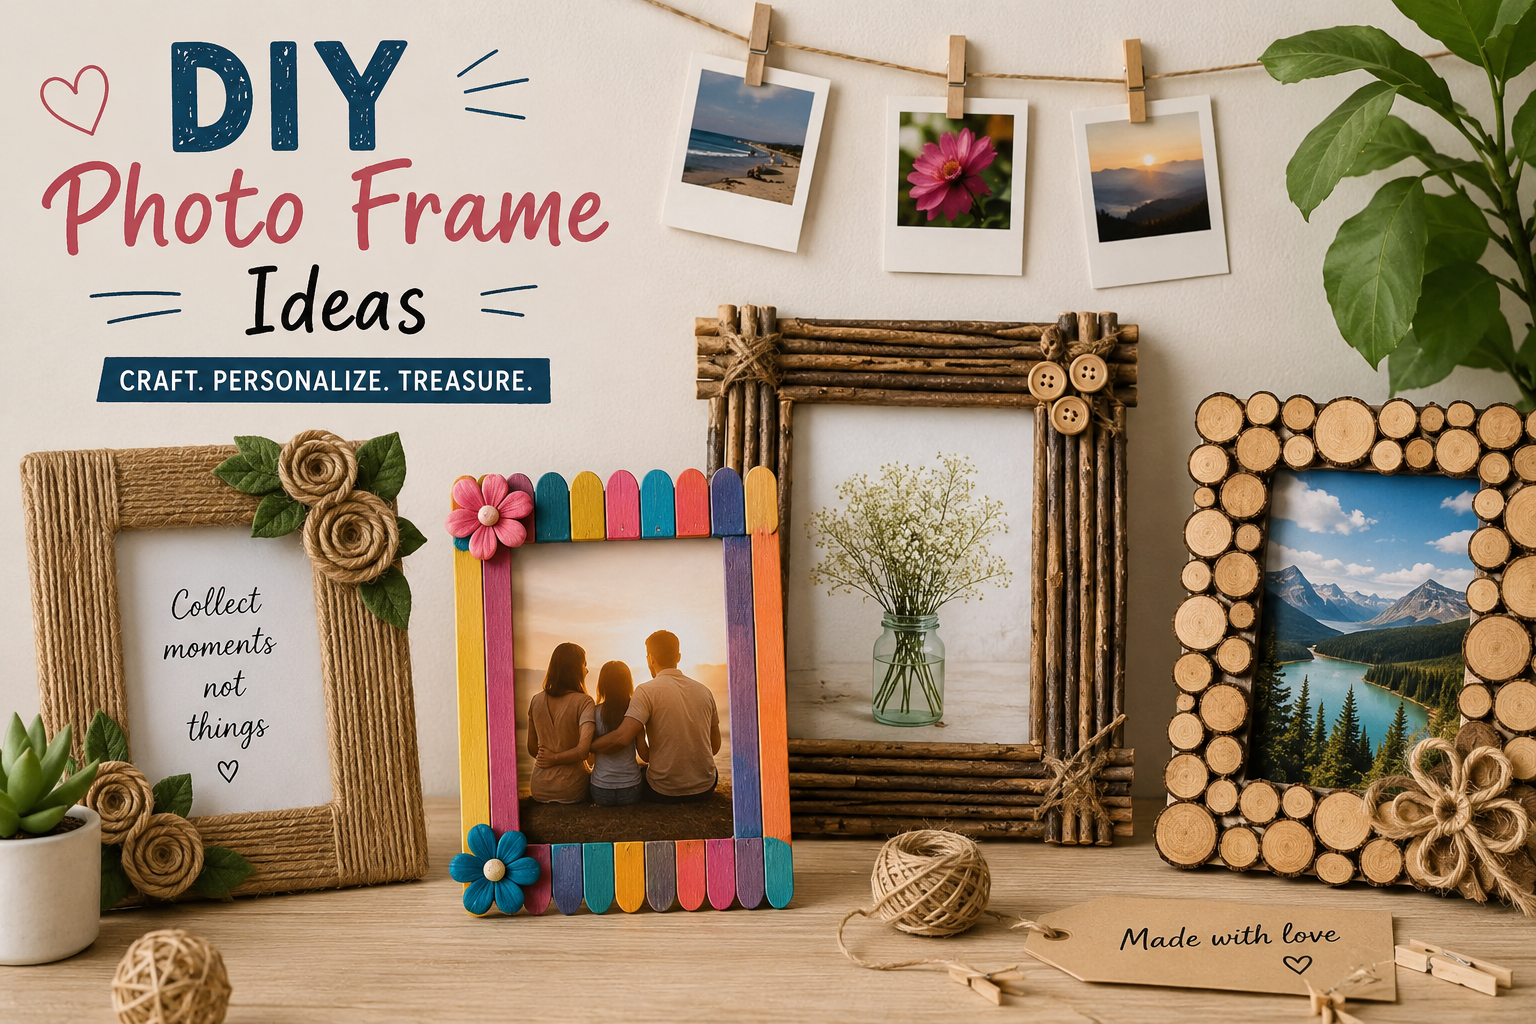
Your favorite photos deserve more than a basic store-bought border. With a few inexpensive supplies, you can turn cardboard, craft sticks, scrap wood, fabric, buttons, or recycled materials into something personal. These DIY photo frame ideas work for beginners, adults, kids, gifts, school projects, and wall décor, so you can choose a project that matches your time, budget, and style.
The best part is that you do not need advanced crafting skills for most projects. Start with the photo size, choose a sturdy base, and decorate the border to suit the room or occasion. The DIY photo frame ideas below combine simple crafts with practical tips so you can make a frame that looks intentional rather than messy.
Quick Comparison of DIY Photo Frame Ideas
| Project | Difficulty | Approx. Cost | Time | Best For |
| Popsicle-stick frame | Easy | $1–$3 | 20–30 min | Kids and beginners |
| Cardboard frame | Easy | $0–$2 | 20 min | Budget crafts |
| Button frame | Easy | $2–$5 | 30 min | Colorful décor |
| Twine frame | Easy | $2–$5 | 30–45 min | Rustic rooms |
| Scrap-wood frame | Medium | $5–$10 | 1–2 hrs | Farmhouse décor |
| Floating frame | Medium | $8–$20 | 1–2 hrs | Modern walls |
| Old-window frame | Medium | $5–$15 | 1–2 hrs | Gallery displays |
This quick guide makes it easier to compare the DIY photo frame ideas before choosing a project. If you need something inexpensive and beginner-friendly, cardboard or craft sticks are good starting points. For a more permanent home décor piece, wood or a floating design is a better choice.
Easy DIY Photo Frame Ideas for Beginners
1. Popsicle Stick Photo Frame
Popsicle sticks are one of the easiest materials for DIY photo frame ideas. Glue four sticks into a square or stack several layers for a wider border. Paint them, wrap them with ribbon, or add buttons and small wooden shapes. A cardboard backing can hold the photo in place.
This is also one of the best easy DIY photo frame ideas for children because the basic structure requires very few supplies.
2. Cardboard Photo Frame
A DIY photo frame cardboard project is practically free if you reuse a cereal box or shipping carton. Cut a rectangle slightly larger than your photo, cut a centered opening, and cover the border with decorative paper, paint, fabric, or magazine pages.
Add a second cardboard layer to prevent bending. This is one of the most useful DIY photo frame ideas when you want a quick craft without purchasing special materials.
3. Button Frame
Cover the border of an inexpensive plain frame with colorful buttons. Sort the buttons by color before gluing so the finished design looks deliberate. This works especially well for children’s rooms, craft corners, or cheerful family photos.
For adults, use buttons in neutral shades such as cream, black, tan, or metallic tones for more sophisticated DIY photo frame ideas.
4. Twine-Wrapped Frame
Wrap jute or cotton twine around a simple wooden or cardboard frame. Apply glue in small sections instead of covering the entire border at once.
Finish with a small bow, dried flower, or wooden tag for a rustic appearance. It is a simple option for farmhouse, cottage, and boho-inspired spaces.
5. Washi Tape Frame
Washi tape is ideal when you want an easy homemade frame without paint or messy glue. Apply overlapping strips around a plain frame, trim the corners neatly, and change the tape whenever you want a new color scheme.
Because the tape is easy to replace, this is one of the most flexible DIY photo frame ideas for seasonal décor.
6. Clothespin Photo Display
Attach small wooden clothespins to a strip of wood, cardboard, or thick rope and clip photos onto them. It is especially useful when you want to change pictures regularly instead of permanently mounting one image.
This style can also become a creative wall display for children’s artwork, travel photos, or family snapshots.
Creative DIY Photo Frame Ideas From Recycled Materials
Recycling opens up some of the most affordable DIY photo frame ideas. Before buying craft supplies, look around your home for sturdy packaging, old frames, magazines, books, or leftover wood.
7. Old Window Frame
An old window can become a large multi-photo display. Clean it thoroughly, check that the structure is secure, and place photos behind the individual panes.
It makes a strong focal point for a hallway, staircase, bedroom, or living room.
8. Magazine Frame
Roll colorful magazine pages into tight tubes and glue them around a cardboard base. Arrange the rolls in alternating colors or use pages from a single color family for a more polished result.
This is a creative example of DIY photo frame ideas that turns paper waste into useful décor.
9. Bottle-Cap Frame
Collect clean bottle caps and arrange them around a sturdy frame. This works best for small pictures because the decorations can become heavy.
Use strong adhesive and let the frame cure completely before hanging it.
10. Old Book Frame
A damaged hardcover book can become a creative frame or shadow-box-style display. Cut a photo-sized opening in the cover and reinforce the inside with cardboard.
Choose a book that is already damaged or unwanted rather than sacrificing a valuable copy.
11. Cereal-Box Frame
For another inexpensive cardboard project, flatten a cereal box and use the printed side as the foundation. Cover it with kraft paper, fabric, or acrylic paint, then add a simple stand at the back.
It is particularly useful for DIY photo frame ideas for school projects because the material is inexpensive and easy to customize.
12. Twig Frame
Collect clean, dry twigs and arrange them around a basic cardboard or wooden backing. Tie or glue the corners carefully.
This nature-inspired design pairs beautifully with hiking, travel, garden, and outdoor photos.
DIY Wooden Photo Frame Ideas
Wood creates stronger, longer-lasting frames and gives DIY photo frame ideas a more finished appearance.
13. Rustic Scrap-Wood Frame
Scrap wood is perfect when you want a substantial frame with character. Cut four matching pieces, create clean corners, sand the edges, and join them with wood glue.
Stain the finished frame or leave some natural grain visible. This works especially well with farmhouse and rustic interiors.
14. Reclaimed Wood Frame
Reclaimed boards can give photos an industrial or farmhouse feel. Remove loose nails, sand rough surfaces, and check the boards for stability before cutting.
A clear protective finish can preserve the texture while making the frame easier to clean.
15. Minimalist Pine Frame
Straight pine strips can create a clean frame for modern interiors. Keep the border narrow, sand it smoothly, and use a neutral stain or paint.
This is one of the best DIY photo frame ideas for adults who prefer understated home décor.
16. Wood-Slice Frame
Small wood slices can be arranged around a photo opening to create a natural border. Keep the design balanced rather than overcrowded.
It is a strong option for cabins, rustic bedrooms, nature-themed décor, or handmade gifts.
17. Floating Wood Frame
A floating frame creates a small visual gap between the photo and outer frame, giving the image a gallery-style appearance.
Use clear acrylic or a carefully measured backing system, and make sure the finished frame is securely supported before wall mounting.
DIY Photo Frame Ideas for Kids and Adults
Some DIY photo frame ideas are better suited to younger crafters, while others are more appropriate for adults who want decorative home accents.
18. Finger-Paint Frame
Use a plain unfinished frame as a creative canvas. Kids can add fingerprints, painted dots, names, stars, or simple patterns.
Adults can create a more restrained version using two complementary colors and a simple geometric design.
19. Sticker Frame
Decorative stickers make a quick project for children and beginners. Choose a sturdy frame, arrange stickers before pressing them down, and seal delicate paper stickers with a suitable clear craft medium if desired.
20. Seashell Frame
Glue small clean seashells around a wooden frame for a beach-inspired look. Avoid making one side much heavier than the other, especially if the frame will hang on a wall.
This is one of the more decorative DIY photo frame ideas for vacation photographs.
21. Fabric-Covered Frame
Fabric can completely change the appearance of a plain frame. Cut fabric with enough extra material to wrap around the edges, smooth it as you work, and secure it neatly on the back.
Linen, cotton, denim, and patterned fabric all create different effects.
DIY Photo Frame Ideas for Wall Décor
If your goal is to create DIY photo frame ideas for wall displays, think beyond one frame. Grouping several frames can create a more intentional focal point.
22. Gallery Wall Frames
Instead of making every frame identical, choose a common element such as the same finish, mat color, or frame thickness.
Mix portrait and landscape photos while keeping consistent spacing between frames. This approach works particularly well in hallways, living rooms, and stairways.
23. Hanging Photo Frame
Create a hanging display with a wooden dowel, cord, and lightweight frames. This is useful for renters or anyone who wants a softer alternative to a rigid gallery wall.
Always match the hanging method to the frame’s weight.
24. Multi-Photo Collage Frame
Build one large frame with several openings for family, travel, or milestone pictures. A paper template can help you test the arrangement before cutting permanent materials.
This is one of the most useful DIY photo frame ideas for wall décor because several memories can be displayed together.
25. Shadow Box Photo Frame
A shadow box adds depth around a photograph and leaves room for small keepsakes such as tickets, dried flowers, shells, or handwritten notes.
It is particularly effective for memory displays, travel souvenirs, weddings, and meaningful gifts.
How to Make a DIY Photo Frame From Scratch
Many DIY photo frame ideas become easier when you design the project around your actual photograph rather than forcing the photo into a predetermined opening.
First, measure the picture. Common sizes include 4 × 6, 5 × 7, and 8 × 10 inches. Decide whether you want the photo to sit directly behind the opening or use a mat around it.
Next, select the material. Cardboard is best for an inexpensive craft, craft sticks are excellent for beginners, and wood is better when you want a durable finished frame.
Cut the outer border and photo opening carefully. For cardboard, use a sharp craft knife and ruler on a protected surface. For wood, measure each piece twice and check the corners before applying glue.
Decorate the border after the structure is stable. Finally, add a backing and a simple stand or hanging hardware. Leave the back accessible if you want to replace the photo later.
If you prefer a ready-made craft project, a DIY photo frame kit can also be useful because it provides many basic materials in one package.
How to Make Your Homemade Frame Look Expensive
The best-looking DIY photo frame ideas usually depend on clean execution rather than expensive materials.
Sand wooden edges, keep cardboard cuts straight, and remove visible glue before it dries. For a sophisticated result, limit the color palette to two or three tones.
A simple black, white, natural wood, or neutral fabric frame can look more polished than one covered with too many unrelated decorations.
A mat can also make a major difference. Even an inexpensive handmade frame looks more finished when the photograph has breathing room around it.
Choosing the Right Frame for Your Project
When comparing DIY photo frame ideas, think about four things: the photograph, location, budget, and skill level.
For a school project, cardboard, paper, craft sticks, and recycled materials are practical. For a living room, reclaimed wood, minimalist pine, floating frames, or coordinated gallery frames may work better.
For gifts, personalize the design around the recipient instead of simply adding more decorations.
If you are making several frames, repeat one element across all of them. Matching stain, ribbon, paint, or mat color creates a cohesive display without requiring identical designs.
Tips for Better DIY Photo Frames
Use these practical tips to make your DIY photo frame ideas look cleaner and last longer:
- Measure twice before cutting.
- Test decorative pieces before gluing.
- Use strong adhesive for heavy embellishments.
- Reinforce large cardboard frames.
- Let paint and glue dry completely.
- Sand wood before staining or painting.
- Leave a removable backing so photos can be changed.
- Use appropriate wall hardware for the finished weight.
- Keep irreplaceable photos away from prolonged direct sunlight.
- Avoid overcrowding a frame with decorations.
Common Mistakes to Avoid
One of the most common problems with DIY photo frame ideas is making the photo opening too large. The picture can slip forward unless the backing or mat holds it securely.
Another problem is weak construction. A heavily decorated cardboard frame may bend, while a wooden frame with poorly aligned corners can look uneven.
Finally, do not forget the display environment. A beautiful frame can still look out of place if its colors clash with the room or if several gallery-wall frames have inconsistent spacing.
Conclusion
Making your own frame is an easy way to turn an ordinary photograph into personalized décor. Whether you choose cardboard, craft sticks, recycled materials, fabric, twigs, or wood, the best project is one that fits your skill level and the place where the photo will be displayed.
Start with one simple design, focus on clean measurements, and then experiment with colors and textures. These DIY photo frame ideas can become inexpensive gifts, memorable school projects, or stylish additions to your home.
FAQs About DIY Photo Frame Ideas
What is the easiest DIY photo frame to make?
A popsicle-stick or cardboard frame is usually easiest because the materials are inexpensive and require few tools. Both can be decorated with paint, paper, buttons, fabric, or stickers.
How can I make a photo frame cheaply?
Reuse cardboard packaging, an old frame, scrap wood, magazines, or craft supplies you already have. Cardboard is especially useful when you want a nearly free project.
How do you make a photo frame from cardboard?
Cut a sturdy cardboard rectangle, create a centered opening slightly smaller than the photo, decorate the border, and attach a second piece of cardboard behind it. Add a stand or hanging loop.
What are good DIY photo frame ideas for adults?
Adults can try reclaimed wood, floating frames, fabric-covered frames, twine, dried flowers, shadow boxes, or minimalist designs. Choose the project based on the room’s existing décor.
Are homemade photo frames good for school projects?
Yes. Cardboard, paper, craft sticks, recycled packaging, and simple decorative materials work well for school projects because they are affordable and easy to customize.
How do I make a DIY frame look professional?
Focus on straight cuts, clean corners, smooth surfaces, balanced decoration, and a coordinated color palette. A mat around the photo can also give a handmade frame a more finished appearance.
What is the best DIY photo frame for a wall?
For walls, lightweight cardboard displays, wooden gallery frames, floating frames, multi-photo collages, and hanging photo displays are all useful. Choose the hanging method according to the frame’s weight.
You May Also Read: DIY Candle Holder Ideas
